
How to Install Tape-In Hair Extensions at Home: A Step-by-Step Guide
If you’re dreaming of voluminous, long, and luxurious hair but don’t want to visit a salon, tape-in hair extensions can be the perfect solution. These semi-permanent extensions are popular for their natural look and lightweight feel. The best part? You can install them yourself at home with a bit of patience, the right tools, and a good step-by-step guide.
In this blog post, we’ll cover everything you need to know about tape-in hair extensions—from preparation to installation and aftercare. Whether you’re a hair extension newbie or someone who wants to save salon costs, this comprehensive guide will help you get professional-looking results right from your own mirror.
What Are Tape-In Hair Extensions?
Tape-in hair extensions are pre-taped wefts of real human hair or high-quality synthetic hair that you “sandwich” around a thin section of your natural hair. They lie flat against the scalp and blend seamlessly, making them ideal for adding length, volume, or both. Depending on how well you take care of them, tape-ins can last anywhere from 6 to 8 weeks before needing to be reapplied.
Tools & Supplies You’ll Need
Before you begin the installation process, gather the following tools:
- Tape-in hair extensions (Choose high-quality Remy human hair for best results)
- Rat-tail comb (for parting your hair)
- Sectioning clips (to hold hair out of the way)
- Flat iron (optional for sealing adhesive)
- Clarifying shampoo
- Hair straightener or blow-dryer (to style before and after application)
- Mirror (preferably two mirrors or a friend to help with the back sections)
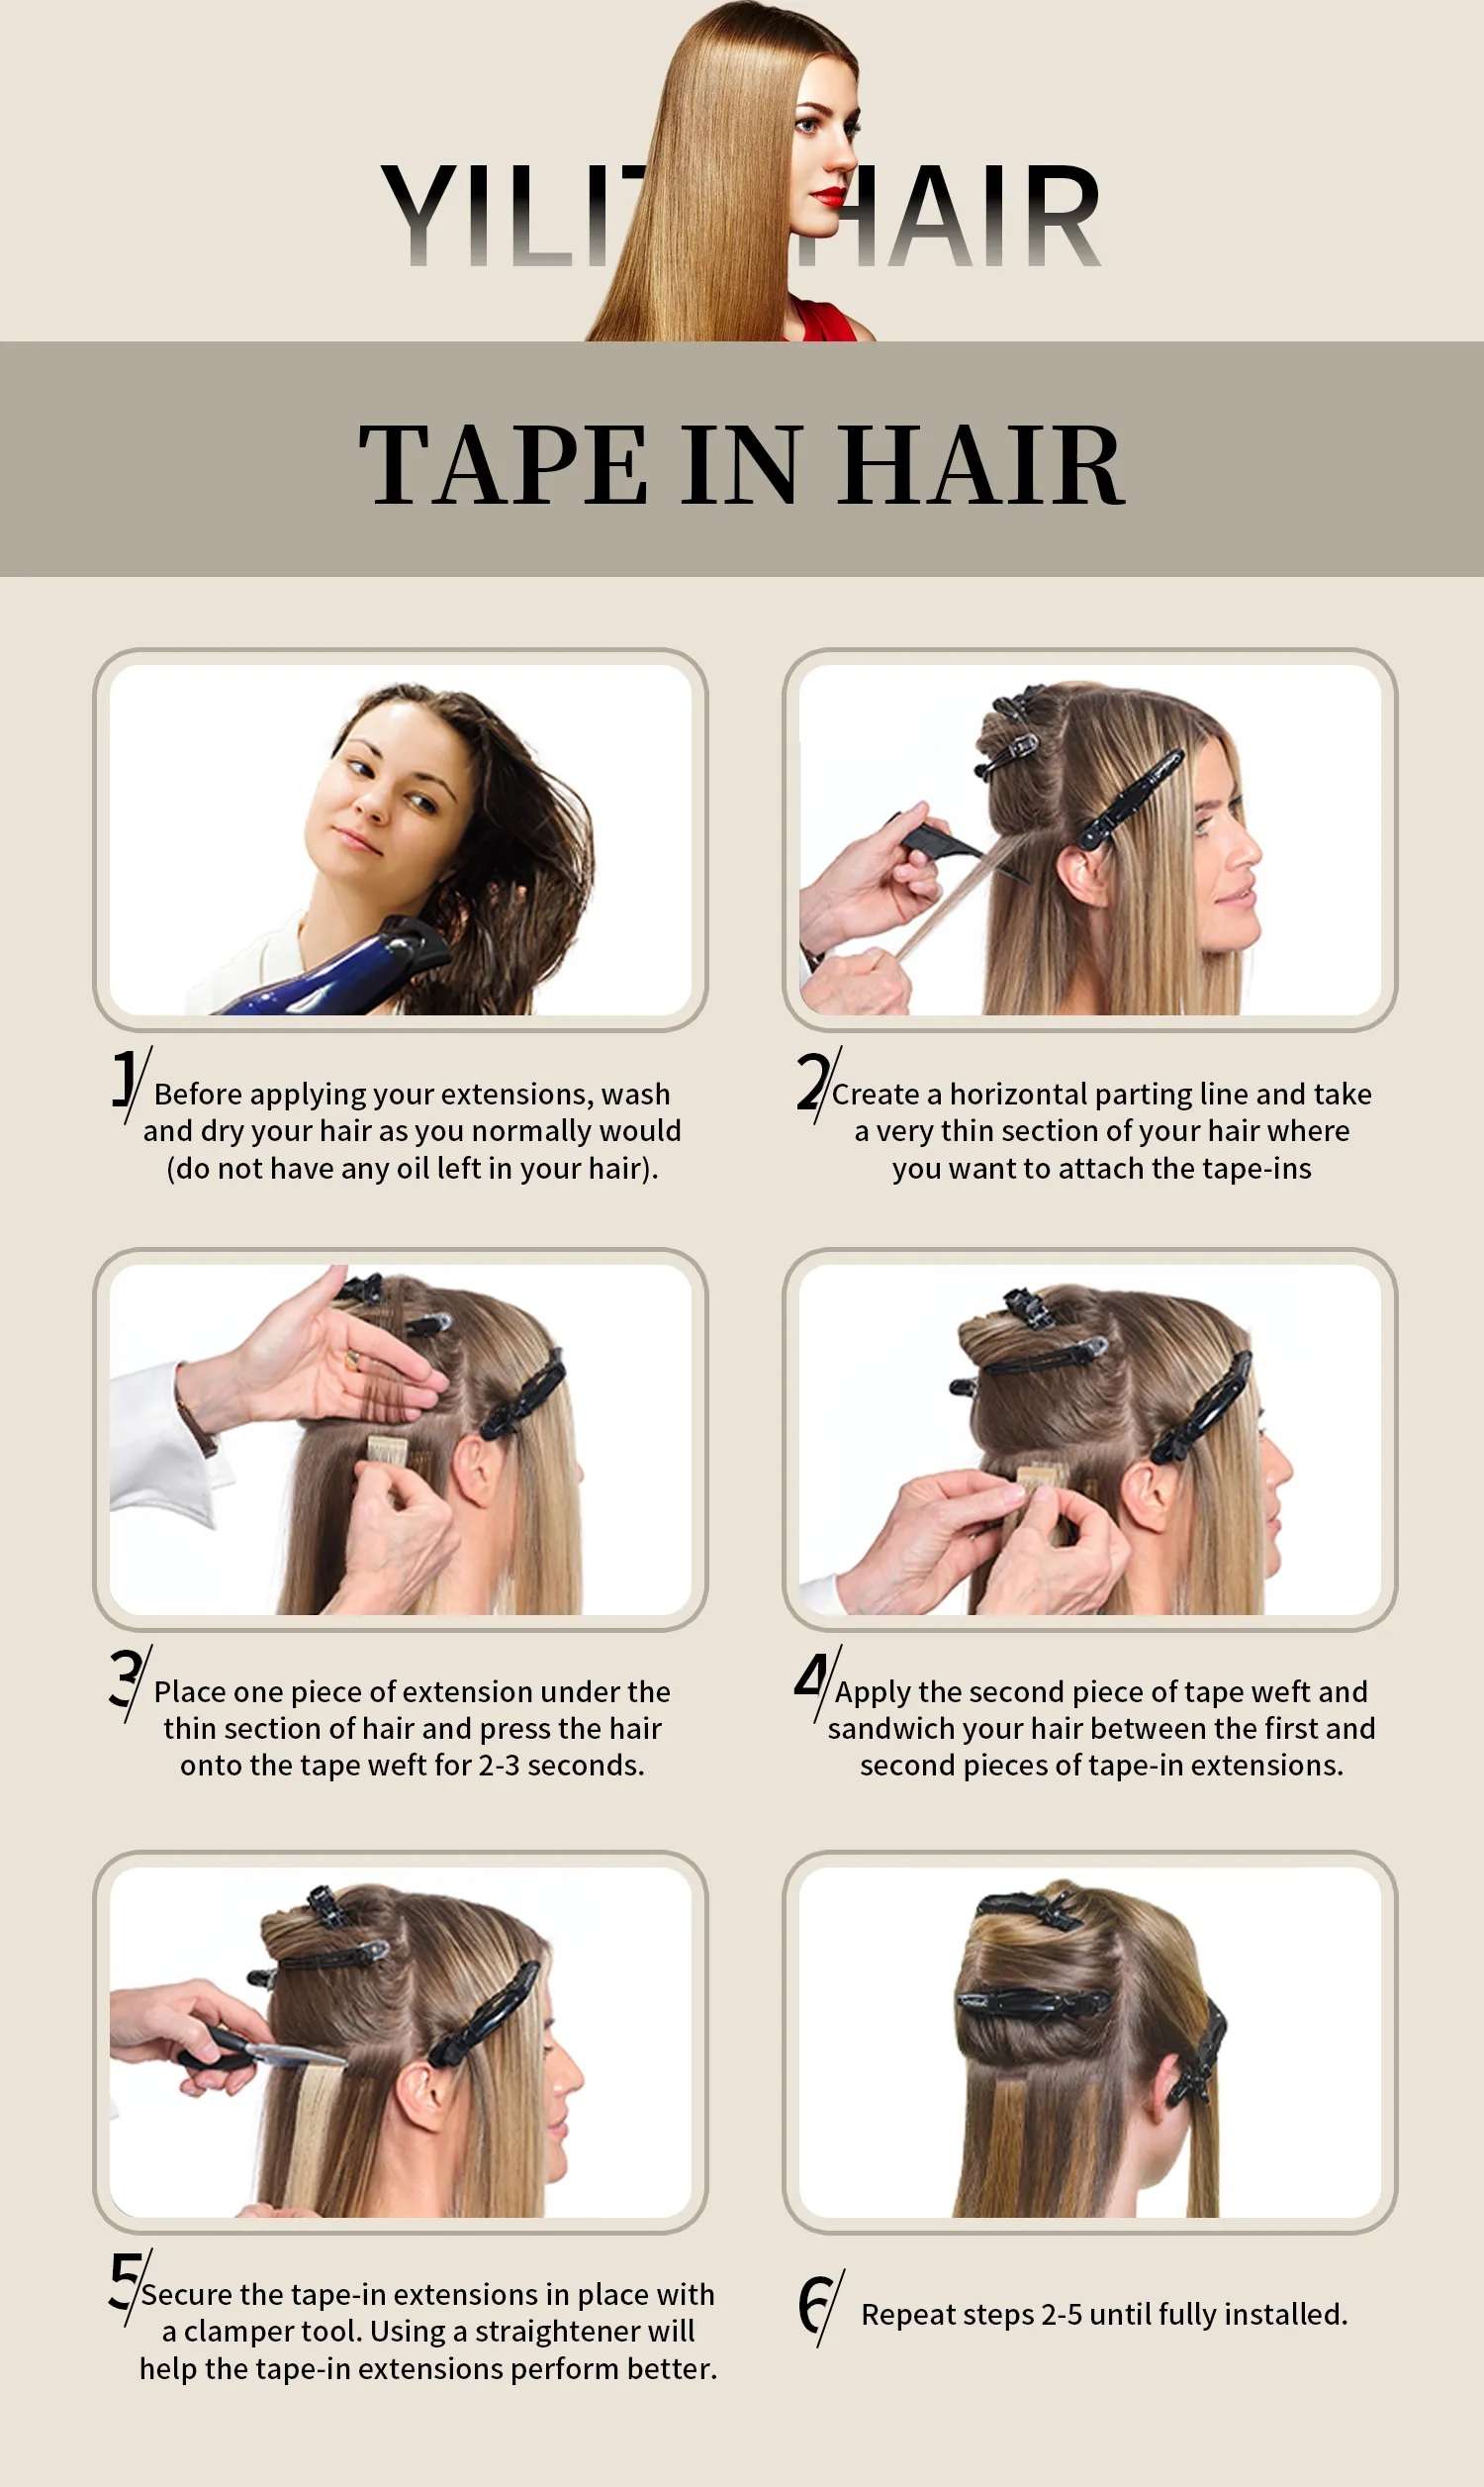
Step 1: Prepare Your Hair
Proper preparation ensures better adhesion and longer-lasting results.
1. Wash with Clarifying Shampoo
Use a clarifying shampoo to remove any product buildup, oils, or residue from your scalp and hair. Avoid using conditioner, as it can make your hair too slippery for the adhesive to stick.
2. Dry and Straighten Your Hair
Make sure your hair is 100% dry. Tape-in extensions should never be applied to damp or wet hair. Straightening your hair before application can also help ensure smooth and even placement of the extensions.
Step 2: Section Your Hair
Divide your hair into clean, horizontal sections. Start from the bottom and work your way up.
1. Part Your Hair Horizontally
Using a rat-tail comb, part your hair about 1 inch from the nape of your neck. Clip the rest of your hair out of the way.
2. Create Thin Strips for Sandwiching
From this section, isolate a thin strip of your natural hair—about the same width and density as the tape-in extension. If the section is too thick, the adhesive won’t bond properly; if it’s too thin, it may cause discomfort or even hair damage.
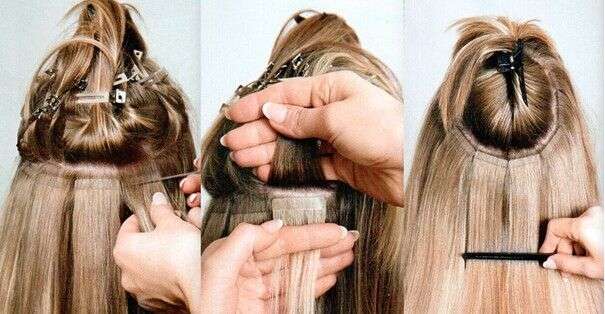
Step 3: Apply the Tape-In Extensions
Now that your hair is sectioned and ready, it’s time for application.
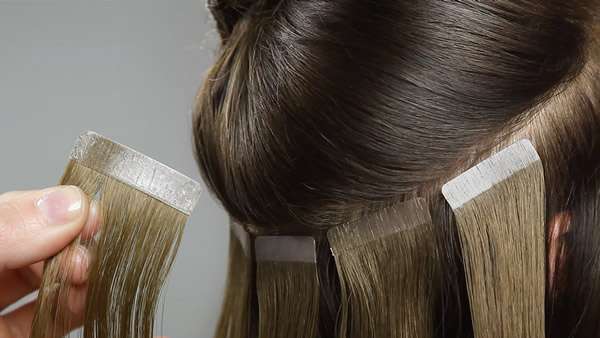
1. Peel Off the Adhesive Backing
Carefully peel the backing off the first extension tab. Don’t touch the adhesive too much, as oils from your fingers can weaken the bond.
2. Place the Extension Under the Section of Hair
Hold the extension strip underneath your isolated natural hair strand, about ½ inch away from the scalp.
3. Sandwich with a Second Extension
Take another weft of tape-in extension and press it firmly on top of the same strand of hair, sandwiching your natural hair in between the two adhesive tapes. Make sure both wefts are aligned properly and press together firmly.
4. Apply Gentle Pressure
Use your fingers or a flat iron (set to low heat) for a few seconds to add light pressure and ensure a secure bond. Be careful not to use high heat directly on the tape, as it can melt or weaken the adhesive.
Step 4: Repeat Throughout the Head
Continue working in horizontal rows, moving upward. Make sure to:
- Keep at least an inch of space between your scalp and the tape-in extension.
- Avoid placing extensions too close to your hairline, parting, or temples.
- Leave enough hair on top to fully cover the extensions and maintain a natural look.
Typically, 20 to 40 wefts (10 to 20 sandwiches) are needed for a full head, depending on your hair thickness and desired volume.
Step 5: Blend and Style
After all extensions are applied, it’s time to blend and style your hair.
1. Trim if Needed
For the most natural look, trim the extensions to match your haircut. This is especially important if you have layered or blunt-cut hair.
2. Style as Desired
You can now curl, straighten, or wave your hair as desired. Human hair extensions can be styled just like your natural hair. Be cautious with heat tools, and always use a heat protectant spray.
Aftercare Tips
To keep your tape-in extensions looking fresh and lasting as long as possible, follow these essential care tips:
1. Wait 48 Hours Before Washing
Avoid getting your hair wet for at least 48 hours after installation. This allows the adhesive to bond securely.
2. Use Sulfate-Free Products
Stick to sulfate-free shampoos and conditioners. Sulfates can break down the adhesive and shorten the life of your extensions.
3. Brush with Care
Use a soft-bristle or loop brush specifically designed for extensions. Always brush gently, starting from the ends and working your way up to prevent tugging.
4. Sleep Smart
Tie your hair in a loose braid or ponytail before bed to avoid tangling. Sleeping on a silk pillowcase also helps reduce friction and protect your extensions.
5. Avoid Oils and Heavy Serums Near the Tape
Products with oils, alcohol, or silicone can break down the adhesive, causing extensions to slip or fall out prematurely. Apply products from the mid-lengths to ends, avoiding the roots.
How to Remove Tape-In Extensions at Home
When it’s time to take them out (usually after 6–8 weeks), don’t pull them out forcefully.
1. Use a Tape-In Bond Remover
Spray a professional-grade tape-in extension remover between the adhesive tapes. Let it sit for a minute to break down the bond.
2. Gently Pull Apart
Gently pull the top and bottom wefts apart, being careful not to yank your natural hair. Use a fine-tooth comb to remove leftover adhesive residue.
3. Wash and Condition Your Hair
Once all the extensions are out, wash your hair thoroughly with clarifying shampoo to remove any remaining tape residue and give your scalp a breather.
Pros and Cons of DIY Tape-In Extension Installation
Pros:
- Saves money compared to salon visits
- You can do it on your own schedule
- Great for learning and practicing hair styling skills
Cons:
- Time-consuming, especially for beginners
- Harder to place evenly at the back of the head
- May not last as long without professional application
Final Thoughts
Installing tape-in hair extensions at home is completely achievable with the right tools, patience, and attention to detail. Once you get the hang of it, you’ll find it to be a rewarding and cost-effective way to enhance your hair’s length and volume. Whether for a special occasion or just to boost your everyday look, tape-ins are a game-changer in the DIY beauty world.
Ready to give it a try? Start with high-quality extensions, follow this guide step by step, and you’ll be flaunting fuller, longer hair in no time!
Let me know if you’d like a printable step-by-step checklist, or a visual diagram of the sectioning method.