How to Install Tape-In Hair Extensions at Home: A Step-by-Step Guide
Hair extensions have become a go-to solution for anyone looking to add volume, length, or a little extra glam to their hairstyle. Among the many types available, tape-in hair extensions stand out for their ease of use, natural appearance, and durability. The best part? You don’t necessarily need a trip to the salon to enjoy the transformation. With a little time, care, and patience, you can learn how to install tape-in hair extensions at home.
This comprehensive guide will walk you through everything you need to know—from preparation to maintenance—so you can install your extensions with confidence and achieve flawless, salon-worthy results.
What Are Tape-In Hair Extensions?
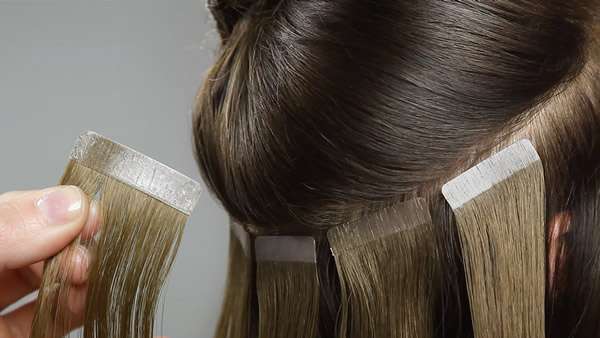
Tape-in hair extensions are made of wefts (small sections of hair) with a thin, double-sided tape strip at the base. These tape tabs are designed to “sandwich” your natural hair between two extension wefts, creating a seamless and natural look. They lie flat against your scalp and blend effortlessly, making them virtually undetectable.
They are semi-permanent and can last between 6 to 8 weeks with proper care. Once the adhesive loses its grip, you can remove and re-tape them for reuse.
Who Can Use Tape-In Extensions?
Tape-in extensions work well for most hair types, especially fine to medium-thick hair. If you have very short hair (shorter than 3 inches), blending may be more difficult. For best results, your natural hair should be at least shoulder-length or slightly shorter.
Tools You’ll Need
Before starting the installation, gather the following items:
- Clean, dry tape-in hair extensions (human hair is preferred for the most natural result)
- Rat-tail comb
- Sectioning clips
- Fine-tooth comb
- Hair straightener (optional for blending)
- Extension tape remover (for future removal)
- Mirror (a second mirror helps if working on the back)
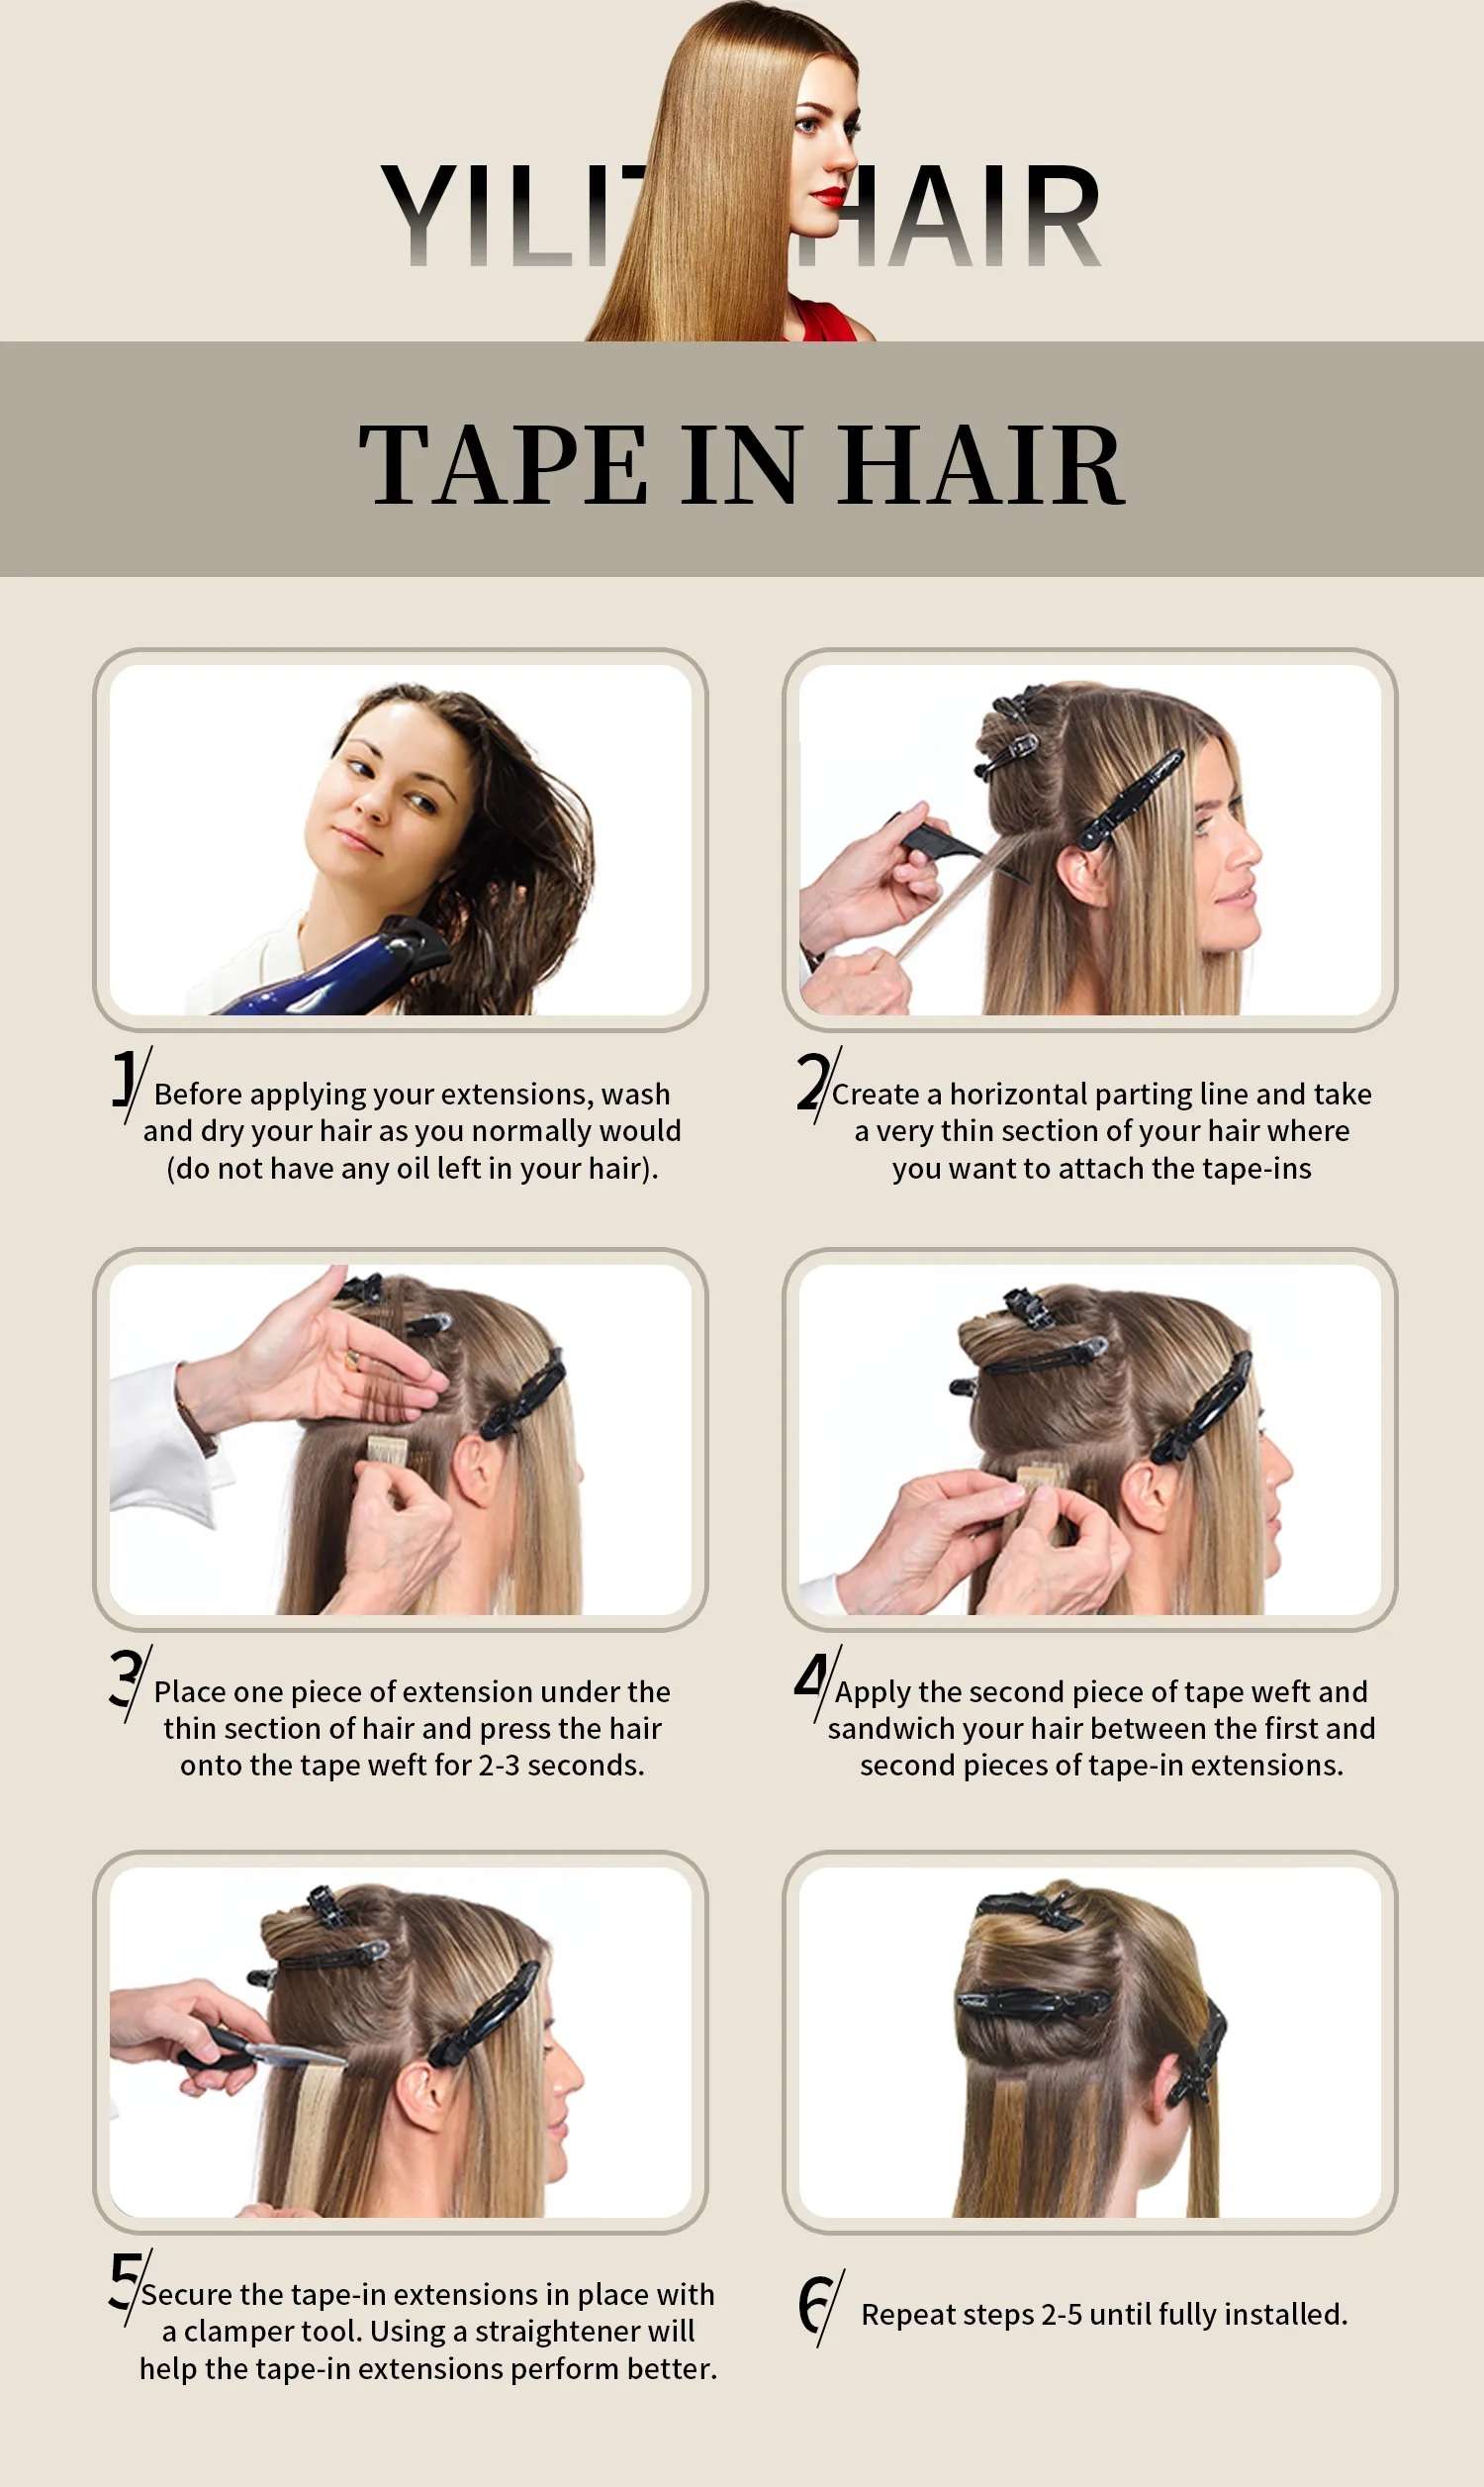
Step 1: Wash and Prepare Your Hair
Start with clean, dry, product-free hair. Do not apply any conditioner, oil, or leave-in product before installation, as this can prevent the tape from sticking properly.
- Use a clarifying shampoo to remove any product build-up.
- Make sure your hair is completely dry before applying extensions.
Step 2: Section Your Hair
Proper sectioning is crucial to ensure that the extensions are evenly placed and hidden.
- Using a rat-tail comb, part your hair about an inch above the nape of your neck.
- Clip the upper layers of your hair up and out of the way.
- Make sure the parting is straight—this will serve as the base for your first row of extensions.
Step 3: Measure and Place the First Weft
- Take a thin slice of your natural hair (about the thickness of a sheet of paper) and hold it taut.
- Remove the backing from one tape-in weft and place it underneath the slice of hair, close to the root but not touching the scalp.
- Press gently to secure.
- Take a second weft and press it directly on top of the first weft, sandwiching your hair between the two.
Pro Tip: Avoid using too much or too little hair in each section. Too much hair will prevent the tape from sealing properly, while too little may result in weak adhesion or tangling.
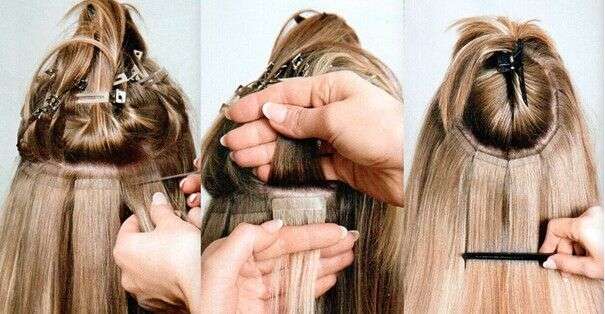
Step 4: Work Your Way Up
Continue working your way up the back of your head in rows.
- Space the wefts about half an inch apart to allow flexibility and movement.
- Avoid placing extensions too close to your hairline or parting to ensure they remain hidden.
Repeat the same process on both sides of the head, maintaining symmetry for a balanced, natural look.
Step 5: Blend and Style
Once all the wefts are installed:
- Let down your top sections and comb through your hair to blend.
- Use a hair straightener or curling iron to style your hair as desired.
- For extra blending, you can have a friend or stylist trim the extensions slightly to match your natural layers.
Aftercare: Keeping Your Extensions Fresh
Proper care is essential for maintaining the longevity and appearance of your tape-in extensions.
Washing Tips:
- Wait 48 hours before washing your hair after installation.
- Use sulfate-free shampoo and conditioner.
- Avoid applying conditioner to the roots or near the tape bonds.
Styling Tips:
- Always use a heat protectant before styling.
- Avoid high-heat settings and do not apply direct heat to the tape tabs.
Sleeping Tips:
- Tie your hair in a loose braid or ponytail before bed to prevent tangling.
- Sleep on a silk or satin pillowcase to reduce friction.
Removal and Reuse
Tape-in extensions are reusable, but they must be removed properly to avoid damage to your natural hair.
To Remove:
- Apply a professional tape-in extension remover to the tape bond.
- Gently peel apart the extension from your natural hair.
- Use a fine-tooth comb to remove any adhesive residue.
- Wash and dry the extensions before reapplying new tape for the next use.
Pros of DIY Installation
- Cost-effective: You save on expensive salon fees.
- Convenience: Install and style them on your own schedule.
- Reusable: Once you master the process, you can reapply them as needed.
Common Mistakes to Avoid
- Using product-laden hair: This weakens the tape bond.
- Improper sectioning: Uneven rows will look lumpy or unbalanced.
- Installing too close to the scalp: Can cause discomfort or limit hair movement.
- Not using enough hair between tapes: Can result in slipping or damage.
Final Thoughts
Installing tape-in hair extensions at home is absolutely achievable with the right tools, preparation, and care. It’s a fantastic way to transform your look in under an hour, giving you the luscious, voluminous hair you’ve always dreamed of—without the salon price tag.
Whether you’re preparing for a special event or just want everyday glam, this DIY method gives you the flexibility to upgrade your style on your own terms. With a little practice, patience, and proper maintenance, your tape-ins can last for weeks and be reused multiple times.